|
With this command, 1992 can place the splashback in the unit of
the floorplan..
Select the button Items.
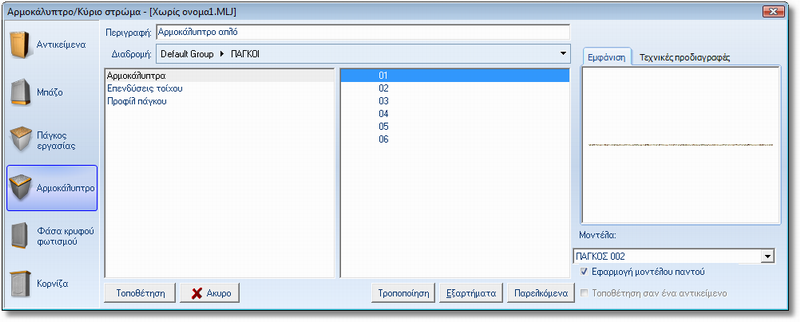
At the left side of the windows Items you can see the available
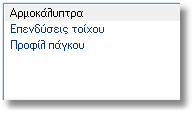
options of items. Select the option Splashback.
In the field Path, you see the active catalog and the
active item category.

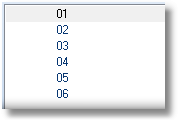
In the left side you see the items of the selected category.
.In the right side you see the items.
In the field Description you see the description of
the selected item.

Also, there are the tabs below.
- Tab show: you can see the worktop preview that you selected.
- Tab technical specifications: it refers to the technical part
of the item.
Placement: close the "Splashback" and display
the floorpaln which you will place the Splashback.
Cancel: cancel the selection from the window "Splashback".
Also, use this button to close the window.
Edit: appear the window "Item edit ",
you can change dimensions, specifications, prices and options of
Splashback, before the placement. (The same window will open if
you double left click on the selected item in the "Splashback").
Attachments: appear the window “Attachments”.
Μodels: show here the selected model (what you
set as the basic model in the window Select Model). From the list
below you can select a different model and the change would apply
only to the active item.
Click the Splashback you wish to enter and then click Placement. The
floorplan is appeared with base and wall items at right and left
a control panel for the Splashback.
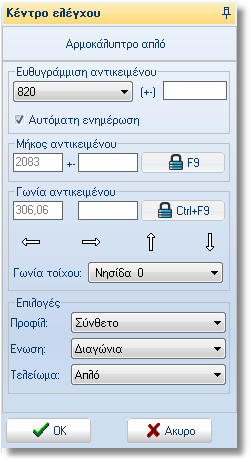 |
In order to place properly the splashback the items should
look white. Items with red or green markings have different
alignment (height) than it should and if you place them splashback,
ti will be placed at the wrong height.
Item Alignment: the list below is showed the
alignments of the installed base units. In the empty field right,
you can manually enter the alignment you want.
Automatic Updates: always have enabled this
command to automatically recognized all the new alignments.
Item Lenght: The price is determined by moving
the cursor. In the blank field you can write to mm the length
you want and press F2 to lock the dimension of the active splashback.
Item Angle: this is determined by moving the
cursor. In the blank field you can write in degrees the angle
you want and press F3 to lock the angle of placement of the
splashback. You can change the angle of placement and the arrows
that appear in the same context or using keyboard arrows. |
Joint: You can select the type of union in the placement
of the splashback. The available options are:
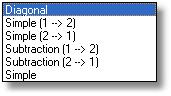
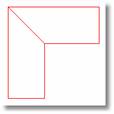 |
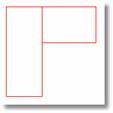
Diagonal: the pieces will link diagonal.
|
 |
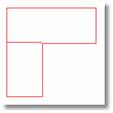
Simple (1-->2): cut the first splashback
and then the second. |
 |
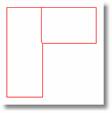
Simple (2-->1): the second splashback
starts after the first is placed. |
 |
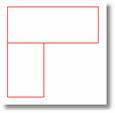
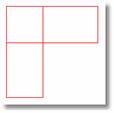
Subtraction (1-->2): remove part of the
second splashback and the first is situated on the blank space.
|
 |
Subtraction (2-->1): remove part of the
first splashback and the second is situated on the blank space. |
 |
Simple: the union is normal. |
Finish: here you can choose the style at the start
and end of the splashback. The options are:
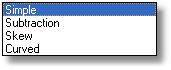
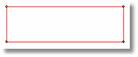 |
Simple: the finish is normal, there is no
change in the shape of the splashback. |
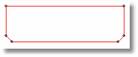 |
Subtraction: remove a small piece of the
external edges of the splashback. |
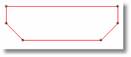 |
Skew: the external angles are cut in skew.
|
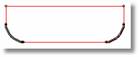 |
Curved: the external angles create a curved.
|
After making all necessary arrangements, press left-click to start
the placement of the splashback and continue to left click with
the other markers.
After placing the splashback, press right-click to modify the part
of it, select Size - shape edit .
You can edit the splashback and change the height the depth. The procedure
is similar to that follow to the design surface for resizing .
From menu "Placement" select "Items"
or press Escape (ESC). The command is deactivated and returned
to the floorplan of the project. Get the perspective to see the
splashback.
|
 Video
Video