|
One of the many capabilities of 1992 is to design and install solid items
except for items that exist in the library. You can design these
solid items by using "Draw Surface".
The tool drawing surface you can work either in floorplan or perspective
or elevation. Here you see the drawing of surface of the floorplan
window.
Select Draw Surface.
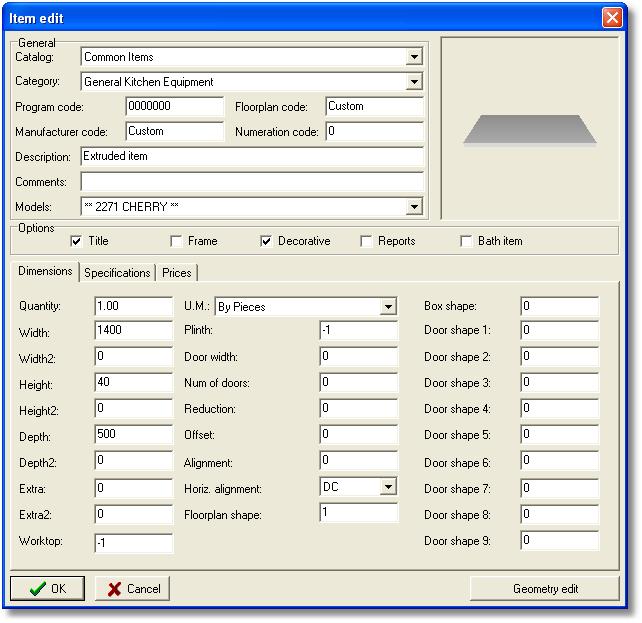
Catalog: select the catalog and give texture to
the item.
Category: choose the category of the item.
Also you can see the program codes, floorplan codes and manufacturer
code and you can change them.
In Description give the name of the item you draw.
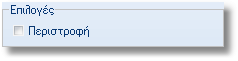
Check or uncheck the options below

Τitle: how or not the description of the item when you
place it in the floorplan.
Frame: appear or not the filling (the filling color
depending on the category which belongs to) of the item in floorplan.
Decorative: if the item is decorative or not.
Reports: apear or not the item in tab cost report.
Bath item: If the item is bath item (for example
if it can be covered with tiles).
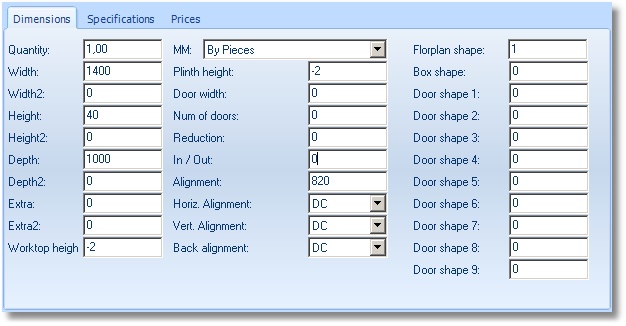
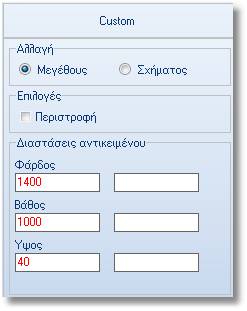
Here you write the dimensions of the new item you create. For example,
write the dimensions as shown below (Width: 1400mm, Height: 40mm,
Depth: 1000mm and Alignment: 820mm).
Here you must give the specifications of the item. You must specify
on all surfaces (Bottom/Side, Top) the type of texture.
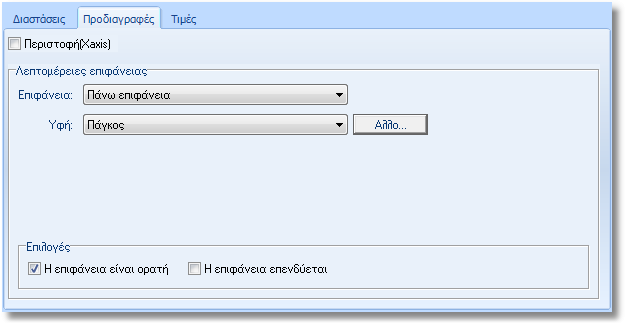
Rotate (X axis): when selected, rotate the item
vertically in space.
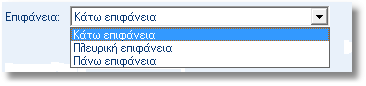
Surface: the output list shows the three surfaces
of the item (Botoom, Side and Top)
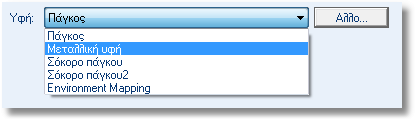
Υφή: you see the texture options bellow of the
selected catalog.

The surface is visible: depending on whether the option
is checked or not, the selected surface of the item is visible or
not.
Tiles on surface: you choose to create bath items
in order to setup tiles. (In this case you should check the option
Bath Item to select texture and in texture category
choose wall).
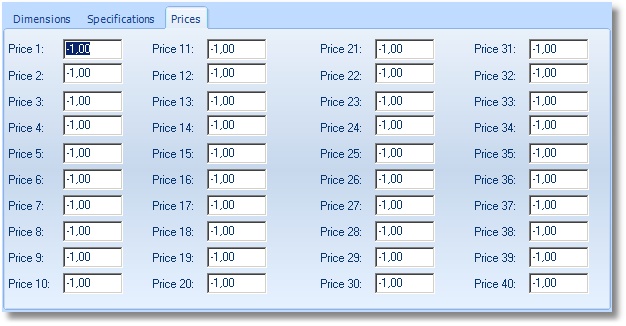
Here you can give price to the item. Fields from Price 1 to 40,
corresponding to the model of the category. According to category,
you can enter the corresponding price of the item that you create.
Note: To see the item Cost you should check the
"Reports" from options.
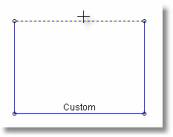
Press OK to show the item in the floorplan and
display the frame Custom.
Note: Press the button Lock Panel to freeze
the window. To close the Control Panel click on Lock Panel again.
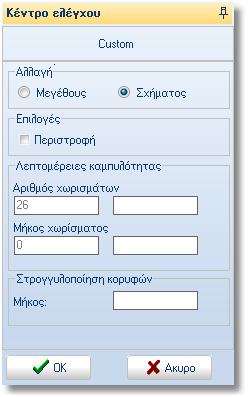 |
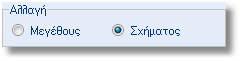
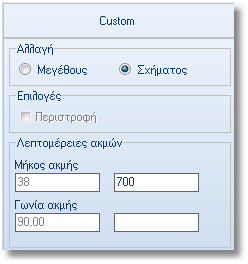
Options: check the Rotate
to rotate the item.
Change: the options are Change Shape
and Size.
|
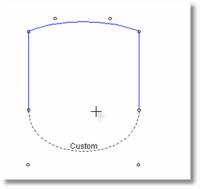
when you enable this option, you can change the shape of the item,
move the vertices of the shape, create new items, create curves.
Here are details on the curves that you create on the item.
Slices: you can write how many divisions will have
the curve. The more partitions, the more smooth is the curve.
Slice width: the length of each segment of the
curve (in mm).
Apex curvavture: you can make curved corners of
the item.
Length: here you write the ray of the curve (in
mm).
Warning! The value of the length should
not be longer than the length of the selected side.
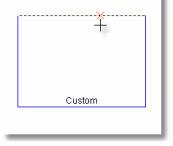
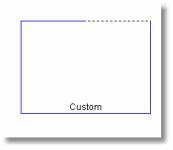
| Pass the cursor near the upper horizontal side of the item. |
 |
Left click (the upper horizontal side of the item).
This creates a new point as it is shown. |
 |
Left, activated to Line details.
The line length write 700mm (for example in
the middle of this edge. The total length of edge is 1400mm).
Press OK or Enter. |
 |
| In the middle of edge has created a new point. |
 |
| "Catch" by left clicking, the point you created in the
middle of the edge and move it up to create a corner. |
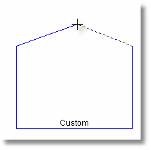 |
| Press Control (Ctrl) and keep it pressed,
then press the left button on the mouse when the cursor appears
as "ovals". |
 |
| It has created a curve, as it is shown. |
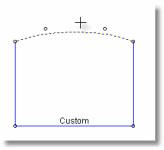 |
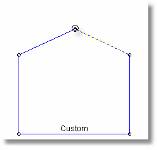
You create the curve as it is shown.
You can also create curves in the following way:
Move the cursor near the bottom horizontal edge. Click right
button and hold it down, then press left button. |
 |
When you activate this command, you can change the size of the
item.
Item Dimensions: here you can change the size of the
item. You can change: Width, Depth and Height. Left, with red shows
the dimensions already exists in the item and the right, in empty
fields, will write the new size (all values are in mm).
Press OK you place the item on the floorplan.
|
 Video
Video